

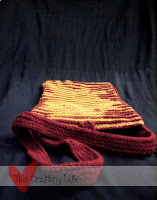
Welcome to Part 2 of the Griffyndor Illusion Bag! In this portion of the tutorial, we'll be making the pieces that are the inside of the bag. During this portion, you won't need any of the knit pieces.

First, you'll need some fabric. I chose some creme colored plain fabric that I had and a contrasting maroon yarn (that matched the color of the bag). First, I laid one of the bag pieces on the fabric and cut out 4 pieces that were about an inch larger all around. (silly me didn't take pictures of that part) Then, since I knew I wanted a pocket inside, I cut another 2 pieces that were the same width but about half the height of the others.
Then, working with two pieces pinned together, I started making diagonal lines with my sewing machine:

Then I turned the work and made more diagonal lines to form diamonds. (for some reason I'm an idiot and didn't take pictures of these pieces finished by themselves, but you can see it in later pictures) I did both large rectangle sets in this fashion.
Then I moved onto the pocket. I wanted the pocket to look a little different than the sides, so I did a double line on this piece, again, pinning both pieces of fabric together:


Here's what the finished pocket piece looks like. (for the sides, imagine the same thing but without the double lines)

Then, I folded over the top of the pocket and pinned it:

Followed by a nice little zig zag stitch to hold it down:

Then I laid this piece on top of one of the side pieces, folded the rough bottom edge under and pinned it into place where I wanted the pocket to be in the bag:

Then, I ran a simple straight seam across the bottom part of the pocket:


And I knew I didn't want just one large pocket, so I went ahead and sewed a straight line to divide the pocket:

The sides are held together with a simple basting stitch and will be dealt with in Part 3 of the Gryffindor Illusion Knit Bag Pattern!
For Review:
Moving Along: