


Now, if you've completed Parts 1 and 2 of the Gryffindor Bag, you're ready for the final (and most fun) part of them all! It's finally time to see how your bag looks!
I started by pinning my two insides to my two outsides. I want both of the right sides facing out (wrong sides together). I started with the pins on the bottom, just doing a simple zig zag stitch (which tends to help hold together knit better)
 |
| the bottom on the back side of the piece |
 |
| the bottom on the front illusion side |
I ran the same zig zag stitch up the sides of the piece (which again I didn't take a picture of... le sigh)
At the top, you're left with a funny overhang, so I cut a slit in it like this:

Opened the top part of the bag like this:

Folded in the corners:

And then the whole top part:

Then I pulled the top of the knit over the edge of the inside fabric and pinned:

And then took it through the sewing machine with another zig zag stitch.

After you've done this to both sides (make sure when you attach the piece with the pocket that the pocket is facing up!!!)
Then, trim off the excess fabric:

Next, lay the right sides of the knit together, pin around the edges that should be closed and sew a zig zag stitch all the way around. (again, sorry there's no picture of that, I guess I was in a hurry!) Turn your bag right side out and you're ready to finish up!
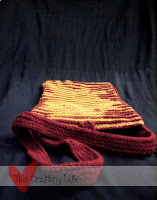
After the bag was all assembled, I attached the shoulder strap and button tab and button, just by using yarn and an embroidery needle.


I hope this tutorial has been helpful and that it has shown you a new way to take any pattern and make it your own!
For a Recap: