Oh to have a kitchen to put this faucet in...

This post brought to you by Moen, Incorporated. All opinions are 100% mine.
So this year I have been doing a ton of different projects around my house, and they're coming very close to completion! This year you're going to be treated to a new bedroom for the girls (new beds, storage and decor yay!), a whole new garden, and a slightly redone bedroom for us too!

The hardest thing about our home is that we don't own it... so there's lots of changes that I would make if I could... and the biggest change that I would make would be in my kitchen!  It's so boring, the counters are ancient, the cabinets are not so pretty and not my style at all.  I try to get around this by adding my own punchy accents, like my big silver hammered bowl and sleek black kitchen aid.  This kitchen of the 80's will never match my shiny marble and brushed metal dreams.

So one day I was searching through the internet to add things to my "dream home" pinboard, and came across this beauty:
 photo 87599srsSET5_zps560c0ecb.jpg
It was like someone read my dreams!  (ok, maybe not perfectly, but very close).  I love the dark marble counter tops, the brushed metal sink, and most of all... the faucet.  I love that it's arched high, so you can put tall pots below it and it just looks sleek.  And the sprayer is built in!!!   I couldn't stop there, and just had to know what it was...  and found this for sale at Lowe's: The Moen Kiran Spot Resist one-handle pulldown kitchen faucet.  Isn't it dreamy?

Some of it's best features?  How about their patented...


 photo SpotResistregjpg_zps01cfd3d1.jpg?


duh.  who doesn't want spot free, fingerprint free appliances?
And the best part is that it's a name that you can trust!


I actually built a whole fantasy kitchen because of this faucet...


This black marble is amazing!


 photo 87599srsSET2_zps497d8a94.jpgLove these polished counters!
Not so much a fan of the white, but love the cabinet style, island and double stove! 
My ideal kitchen would have black marble, open shelves, awesome cabinets, a double oven, a double sink, (perhaps another prep sink... drool), seating, brushed metal, and most of all, lots of natural light!  But alas, that dream is not today.  That day will come, and a girl can always dream... of faucets.
Visit Sponsor's Site

Hey Reader- I want your questions!

So we're at the cusp of spring, when my writing time turns into my photography/editing time, and it gets harder to work on and develop the patterns and lengthy posts that I usually give during the winter months.  I'm still working on them, just not as much.  I was wondering if any of my readers have any questions that you would like answered, about crochet, knit, photography, crafts or any of the other things I talk about on this blog.  I would love to answer your questions while I still have some time!  So please, if there's anything you would like to know, just ask away!  I'll make a blog post response to your question, and try to answer it the best I can, with photos if possible!  :) 

Got a question?  Ask in the comments below!

Garnier Olia Hair Color Review!


I recently had the pleasure of trying out a new hair coloring product from Garnier, called Olia.  It is an oil based hair color, that is supposed to be better on your hair than regular ammonia based dyes. 
I have to admit, when I first heard about this product I was not sure what to think about it being an oil based color. I wondered if it would work as well as the other hair colors that I have used in the past.

Before: My hair lacked body

I went shopping to get my Olia and was pleased by the selection of hair colors, quickly finding a dark brown that I thought would be nice.  I couldn't wait to get started!  When I first opened up the box, I found 4 containers- developer, color creme, a mixing bottle and conditioner. When I opened the developer to add it to the mixing bottle, I made a little bit of a mess. This made me wonder why the developer wasn't already in the mixing bottle like some other brands I had tried. A small matter, however, and I easily moved on.


 After I got everything mixed I started to apply the dye. It spread easily and I was most surprised that there was no strong odor like other dyes. It actually had a very pleasant smell! I tend to use my hands a lot to spread the dye and make sure that I get all of my hair, and after my gloved hands were wet, I found the mixing bottle a little difficult to hold onto because of its round shape.  The gloves were nice and thick, but I couldn't really see the hair dye on my hands because they were black.

 After application, I waited for the 30 minutes required and followed the rinsing instructions included. The conditioner had a nice smell, not overpowering like some. When I got out of the shower and dried my hair, at first I was disappointed. It did not look near as dark as it did on the box. I was a little worried that I would want to redye it later. I went about my business and came back about an hour later to see that it had developed to its full potential. This would have been something nice to know before I got really bummed out about it.I love the color now that it's fully developed!!

After: A huge improvement!!
 
The first day that I showed up to work after doing my Olia coloring, all of my coworkers were amazed.  Everyone thought the new color was great and they couldn't believe how nice and shiny my hair was.  Everyone wanted to know what salon I had gone to!  I just laughed and told them about my awesome Garnier Olia experience!  I think I definitely changed some minds, including mine!  Overall, the only complaint I have about the experience were packaging issues.  In the future, I might use a different bottle and my own gloves, but otherwise, it's a great product!

Can't you see the improvement?  It has a much nicer texture!
Disclosure: I received this product free to review as a BzzAgent, however, the opinions are all my own.  I will always give you an honest review!

Scouting Sunday #15: St. Patrick's Day Treats


Hello and welcome back to another Scouting Sunday, where I find and bring you some of my favorite things from around the web.  This week we'll be talking about St. Patrick's Day Treats!
  If you're a blogger and you've been "Scouted" be sure to grab a button at the bottom to put on your blog or post!

Let's jump right in and start with some awesome looking green cupcakes!

Key Ingredient brings us these St. Patrick's Day Green Cupcakes
Also try these Shamrock Milkshake cupcakes!

Shamrock Milkshake Cupcakes at Better Homes and Gardens
Or make a cupcake rainbow!!!!!!!
 If you're a fan of leprechaun traps, you'll LOVE this cake!
 
Leprechaun trap cake
Your kids will also love these little mini pizzas!  Try making clovers from mini pepperonis!

Mini Pizzas


  If you're a blogger and you've been "Scouted" be sure to grab a button at the bottom to put on your blog or post!


This Crafting Life

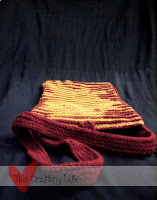
Gryffindor Illusion Bag, Part 3 {knit pattern + tutorial}


Now, if you've completed Parts 1 and 2 of the Gryffindor Bag, you're ready for the final (and most fun) part of them all!  It's finally time to see how your bag looks!

I started by pinning my two insides to my two outsides.  I want both of the right sides facing out (wrong sides together).  I started with the pins on the bottom, just doing a simple zig zag stitch (which tends to help hold together knit better)
the bottom on the back side of the piece
the bottom on the front illusion side
I ran the same zig zag stitch up the sides of the piece (which again I didn't take a picture of...  le sigh)

At the top, you're left with a funny overhang, so I cut a slit in it like this:

Opened the top part of the bag like this:

Folded in the corners:

And then the whole top part:

Then I pulled the top of the knit over the edge of the inside fabric and pinned:

And then took it through the sewing machine with another zig zag stitch.

After you've done this to both sides (make sure when you attach the piece with the pocket that the pocket is facing up!!!)

Then, trim off the excess fabric:

Next, lay the right sides of the knit together, pin around the edges that should be closed and sew a zig zag stitch all the way around.  (again, sorry there's no picture of that, I guess I was in a hurry!)  Turn your bag right side out and you're ready to finish up!

After the bag was all assembled, I attached the shoulder strap and button tab and button, just by using yarn and an embroidery needle.


 I hope this tutorial has been helpful and that it has shown you a new way to take any pattern and make it your own!


For a Recap:


Gryffindor Illusion Bag, Part 2 {knit pattern + sewing tutorial}

Welcome to Part 2 of the Griffyndor Illusion Bag!  In this portion of the tutorial, we'll be making the pieces that are the inside of the bag.  During this portion, you won't need any of the knit pieces.  

First, you'll need some fabric.  I chose some creme colored plain fabric that I had and a contrasting maroon yarn (that matched the color of the bag).  First, I laid one of the bag pieces on the fabric and cut out 4 pieces that were about an inch larger all around.   (silly me didn't take pictures of that part)  Then, since I knew I wanted a pocket inside, I cut another 2 pieces that were the same width but about half the height of the others.

Then, working with two pieces pinned together, I started making diagonal lines with my sewing machine:

Then I turned the work and made more diagonal lines to form diamonds.  (for some reason I'm an idiot and didn't take pictures of these pieces finished by themselves, but you can see it in later pictures)  I did both large rectangle sets in this fashion.

Then I moved onto the pocket.  I wanted the pocket to look a little different than the sides, so I did a double line on this piece, again, pinning both pieces of fabric together:


Here's what the finished pocket piece looks like.  (for the sides, imagine the same thing but without the double lines)


Then, I folded over the top of the pocket and pinned it:

Followed by a nice little zig zag stitch to hold it down:

Then I laid this piece on top of one of the side pieces, folded the rough bottom edge under and pinned it into place where I wanted the pocket to be in the bag:

Then, I ran a simple straight seam across the bottom part of the pocket:

And I knew I didn't want just one large pocket, so I went ahead and sewed a straight line to divide the pocket:

The sides are held together with a simple basting stitch and will be dealt with in Part 3 of the Gryffindor Illusion Knit Bag Pattern!  


For Review:


Moving Along: