Showing posts with label diy. Show all posts

Crafting from the Kitchen: Sugar Scrub {DIY Sugar Scrub Craft Tutorial}


DIY Homemade Sugar Scrub 


Materials Needed:

Sugars:

I used a Coarse Raw Sugar and some regular Granulated Cane Sugar

Carrier Oils:

I used several, including Extra Virgin Olive Oil, Vitamin E Oil, and Grapeseed Oil though you could certainly add your own favorite oils, like Coconut Oil and Almond Oil if desired.

Scented Oils: 

You can really go wild with this one, using what is carried at your local hobby store or ordering some of the more exotic scents off of the internet.  My favorites are Orange Essence, Lemongrass, and Lavender.

Jars to store your sugar scrub in, I use 1/2 pint mason jars

Instructions:

I tend to make multiple jars at once, so I use a mix of one jar of coarse raw sugar and one jar granulated cane sugar for every two jars I plan on using.  To that, I start adding my carrier oils.  I like to use a mixture of the ones I have listed above.
Once you have a coarse sugary mixture that is the thickness you desire, start adding a couple of drops of your scented oils.  Keep stirring and add scent until you reach the strength you like.  Fill the jars with the sugar scrub mixture and seal.  Add labels with the scent and usage instructions.

You'll enjoy gifting these little treasures, but make sure to save a couple for yourself!


Guest Post: 10 Cute and Handy Ribbon Uses

I am obsessed with ribbon. The following are my favorite ways to use ribbon because it makes everyday life just a little bit more adorable. Most of these simple ideas can be made with stuff just lying around the house. You can browse bulk ribbon by going here, and start coordinating which colors and patterns you want to use in certain ways.

1. Double knot a ribbon and tie it in a bow around your boring Samsonite luggage. This adds a cute personal touch, and will prevent that awkward and confused moment when you grab a stranger’s luggage. You can use a single ribbon, or go crazy with it, fitting as many as possible onto the handle.

2. Wrap a piece of ribbon around your ponytail and tie a perfect bow. This is classically beautiful, and makes almost any hairstyle look instantly polished. If I realize that my outfit is too dark and drab, a pretty red ribbon in the hair adds life to an otherwise gothic look.

3. Make a photo collage for a loved one, and frame it with the perfect ribbon. I made a black and white mix of photos and glued a bright red ribbon around the edges of a thrift store frame. This turned out to be part of a perfect one year, dating anniversary gift I gave my boyfriend at the time. This idea also happens to be really cheap, so it is great for anybody on a budget.

4. Tie a ribbon around a dress to change the look of your curves. I love this one. Tie the bow and slide it around to the back. This will make your waist look smaller and break up a pattern to add contrast.

5. String up a necklace. If you are like me and have a ton of random pendants lying in a jewelry box that sadly never see the light of day, you can easily repurpose them with ribbon. Get a thin ribbon around ¼ inch wide that matches your outfit and whatever bead you have lying around, and string the necklace however you want. You can also add a clasp to make a more permanent necklace (alternatively you would tie a bow behind your neck). I recommend these jewelry pliers, get the tiny baby ones from Wubbers (cute!), for opening and closing the small jump rings.


6. Tie about five inches of ribbon around a paperclip to make a non-slip book mark. I tend to do most of my reading right at bedtime, and I like that this bookmark allows me to place it directly to the right of the line I start dozing off while reading.


7. Use a real ribbon while gift wrapping. This doubles a gift’s cuteness factor. Even if you are giving the gift to a particularly masculine boyfriend, a bright green or blue ribbon is still appropriate and handy.

8. Tie a ribbon around a canning jar. Canning jars make great containers for dry recipe gifts, lights and even jams or jellies! Whatever you put in the jar, adding a touch of color and decorations will set it off.

9. Use it as a key ring and never chip a nail on those hazardous metal circles again. Make sure to double knot the ribbon so you can rest assured that no keys will go missing.

10. Tie different colors around the stems of wine glasses. Besides adding a cute splash of color to tonight’s glass of wine, it also will help guests at a dinner party keep track of their beverage.


Angela Johnson is a freelance writer for HairBow Center. She loves crafting, sewing and DIY projects of all kinds. She lives in Salt Lake City, Utah with her family and two dogs.

Scouting Sunday #16: Moustache Crafts


Here's a Quick Scouting!  Mustaches have been a huge trend lately, which, quite frankly, I can't explain.  However, they are quirky and amusing and I thought I would bring you all some fun mustache crafts for you to try on your own!


silly mustache straw craft
Make your own silly mustache straws!!

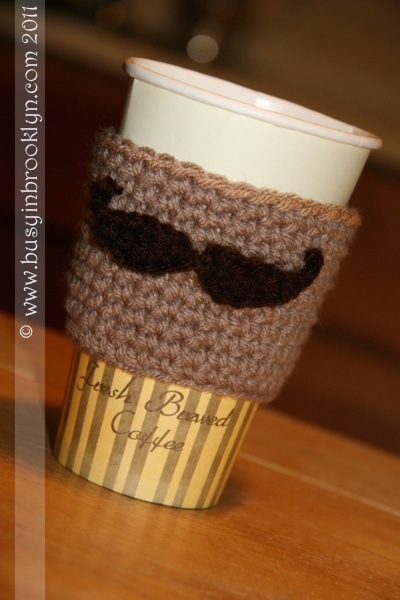
mustache cup cozy crochet craft
Crochet your own Mustache cup cozy!

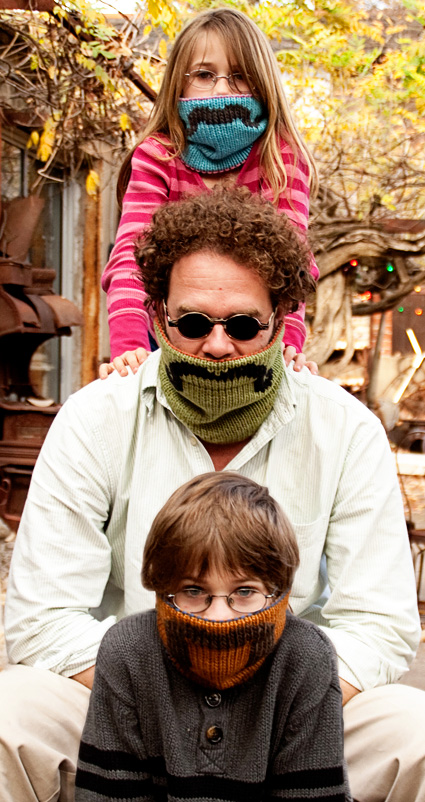
knit mustache cowl cozy diy
Knit your own Mustache Cowl
mustache diy
Make your own mustache!
print and cut mustache craft
Simply print and cut your own disguise!

Guest Post: DIY Table Centerpieces

5 DIY Table Centerpieces
Spruce up your table and breathe life to your home by stretching your imagination a little bit further and taking advantage of your resources! If you are short in time, it’s still possible to add some wow on your table arrangements to add a profusion of color and life wherever your place it.

www.wedding-flowers-and-reception-ideas.com


Dried Wheat Centerpiece
If you want something new and exciting, why not display dried stalks of wheat or rice, especially if you don’t have any fresh flowers around?
 I find this rustic centerpiece very whimsical and inspiring. For people who want to bring the beauty and blossom inside their living or dining room, then, this DIY centerpiece is an option! It’s very simple and easy to create and the materials are very abundant. Whenever I plan to throw a little spring party at home, the dried wheat centerpiece always comes to my mind. I’d usually gather several manzanita branches, then I would place them on a tall vase and there I have a nice and attractive centerpiece. I love the branches because they look gorgeous while the twists and curls all add up to the drama.

Balloons
Balloons have really come a long way. They’re now among the most popular centerpiece items, especially for special occasions. I once tried black balloon when I held a summer get-together with high school friends at home and I was very happy that everyone liked what I did! Here’s the secret to how you do it. First, layer kraft paper on top of a neutral tablecloth then top it with black-and-white table runner. I tied the balloons with chandelier crystals so to keep them on the table. I also placed scented votive candles to enhance the ambiance and make it more relaxing. One magazine  told me that to make the balloons personalized, try to embellish each with photographs, especially if you’re celebrating birthdays, anniversaries, or special holidays with friends and families.

Two-in-One DIY Centerpiece
What a nice centerpiece you’ll make if you try placing a peony on a small crystal or ceramic container. Get lots of them then group them together and you’ll see the nice effect. Aside from its decorative role, this centerpiece also functions as party giveaways. You can tell guests to take a vase home at the end of the evening, and you've got your favors covered, too. Add variety to the height by cutting the flowers into various lengths before placing them on the vase.

Yellow-and-White Wedding Centerpieces
Create bold yellow-and-white centerpieces by arranging jonquils, ranunculus, tulips, and sweet peas in single-variety containing. What I love about this centerpiece is that it boasts of rich variety of textures that will look pleasant to the eyes. Go for neutral themed vases, which are eye friendly, then, tie a yellow ribbon on each vase for added appeal.

Fresh Flower Centerpiece

Any vase will look wonderful and more exciting if you try enhancing its look with bands of scrap-booking paper and bell strings. Just wrap around the vase with a strip of scrap-booking paper. Accentuate the vase with strings the bells and buttons then tie it around the vase. Heighten the drama with boughs of fresh flowers. Make three to five of these, then place them at the center of your table and you’ll have a very attractive flower centerpiece to catch everyone’s eyesight. 

About the author – Manilyn Moreno is an event planner and caterer. As an event planner, she’s always on the go in thinking innovative ideas for special occasions and events. She also blogs and shares tips on how to optimize catering profit by using software for catering.