Showing posts with label garden. Show all posts

Natural Living: A Garden of Abundance


I have been growing food now for over a decade, and a few years ago, gardening saved my life.  

I don't mean that it literally saved my life, but figuratively.

I had just gotten a new raised bed into place, everyone told me I was doing it too early, but I figured it didn't hurt anything since the weather was starting to get nice.  I will forever be thankful I had done it.

In April, I got really sick.  Like really really sick.  Was in the ER for about 16 hours, only to end up in emergency surgery.

Everything changed.

My life, that had seemed so full of opportunity and growth, suddenly screeched to a halt.  I couldn't exercise, lift anything over 5 pounds, stand for long periods of time, or even sit for long periods of time.  Car rides were horribly painful, so traveling was out entirely.  I became horribly depressed about everything, even though I tried to put on a brave face.

A couple weeks later, it was the normal time that I would start planting in the garden.  I didn't even want to do that. I couldn't guarantee that I would be able to even go and shop for plants.  I didn't want to have to try to take care of them and keep them alive... when I was barely living myself.

A good friend said to me, "You need a distraction, and you need to eat. The garden will fulfill both of those needs."  And then they put me in the car and drove me to the greenhouse.

We picked out tomatoes, peppers, cucumbers and beans.  A few herbs. Simple items that could be used in a variety of ways and be fairly easy for me to handle.  They got me a kneeling pad so I could be more comfortable on the ground.

They came back and helped me put everything in the ground, and they did most of that initial planting.... and then it was up to me.

Every morning, when I'd be fighting discomfort and depression, there was a new fleeting thought:
"I wonder how the garden looks this morning"
And I would go out and inspect all the plants and walk among the greenery, watering what needed it, adjusting trellises, and picking stray weeds.


Over the weeks that followed, I started thinking less about how terrible everything was, and instead more about how much food I might get from the garden, was I doing everything I could to make it healthy and prolific?

It gave me a purpose outside myself.

And when it started producing, it was like it was giving back all the love that I had given to it.  Pounds of beautiful red, ripe tomatoes, beans by the basket, giant cucumbers and fragrant herbs.


It nourished my body and my spirit, and made me feel like I could make it through all of this.  

At the end of the summer, I had a follow up surgery to complete what they had started in April.  The garden kept producing throughout my recovery and, as if it knew I would be ok, started dying back just when I was feeling better.  It gave me a few last good harvests and I cleaned it out in late October.


I continue to grow my garden every year, but I think my perspective on it has changed.  It is no longer just about growing food, but about providing myself an outlet, a place of peace and relaxation, and through that, caring for my body and mind.

It is about this time of year that I start plotting my garden for the summer. I'll start seeds in early February - March, which means I need to pick out what I am going to tend to this year.

Here are my preliminary thoughts:


Left to Right, top to Bottom:

Purple Galaxy Tomato, Dad's Sunset Tomato, Rainbow Swiss Chard
Cosmic Purple Carrots, Cayenne Pepper, St. Valery Carrot
Tom Jalapeno Peppers, Wapsipinicon Peach Tomato, Chinese Green Long Bean
Black Krim Tomato, Sugar Bon Snap Peas, Bull's Blood Beets

All seeds are from my favorite seed site, Baker Creek Heirloom Seeds
(And no, I'm not being paid to promote them, I've shopped from them for years for strange varieties of vegetables and fruits. They have a great germination rate and the fruits are always well worth it!)

I'll be bringing you all along on my gardening journey this year - hoping that  I can finally have a successful year with the greenhouse, but we will have to see!


Countdown to Christmas: Unique Gifts for the Gardener

I don't know about you, but now that Thanksgiving is past us, I'm so ready for Christmas!!!  The tree went up today along with all the decorations, I'm pretty much done Christmas shopping, but I have some crafting left to do!  Because I'm so excited, I've been gathering unique ideas of great gifts for different types of people, trying to think outside the box!!!  So today, I kick off the Countdown to Christmas posts, starting with unique gifts for the gardener in your life!!!

Click on the pictures to find out more about the item!!!


This solar powered light is the perfect addition to your deck, patio or garden area!!!


Gardeners never want to stop, even when there's snow on the ground-  one of these countertop greenhouses and some packets of herbs would be a great gift in the middle of the winter for gardeners itching to use their green thumb!!


This unique little contraption is actually a new kind of tiki torch, for the more modern minded gardener!


This little grow box is made of bamboo and comes with herbs for your favorite gardener to grow in the kitchen!


This book is eye candy for every gardener.  It includes pictures to make even the most experienced gardener drool!


The green gardener probably composts, and what better gift than this little countertop compost keeper to keep the compost smell in, out of their house!


Lets face it, weeding stinks.  This little tool is a great helper for popping out those difficult to remove weeds!  No more breaking off weeds just to grow back!


When you're gardening, you don't wear jewelry, including a watch (or at least I do)  This beautiful sundial will not only beautify your gardeners life, but provide them with accurate time.... unless there's no sun!


Who wouldn't love these glam pruning shears?  Bring a little beautiful joy to your gardener's life!!

Do you have any great ideas for gardeners?  Leave me a comment below!!!

Let's Talk About Chives

Chives are amazing.

They are the first little green thing that pops up in my garden every year, usually very early spring.  I love having them around to snip and throw into mashed potatoes, corn cakes, you name it. 

Plus they look so pretty. 

They're easy to grow too, and will come back year after year.  This is the small section that we have growing on our deck in a rail planter.  They're handy to have right outside our kitchen door.  We even snip them when there's snow on the ground!


Chives are hardy, but they need to have good soil, and plenty of water.  Pretty much just plant out some sees and let them grow!  Every couple of years you're supposed to dig them up in the fall, split them apart and space them out a little more, and it will also expand your chive garden. 

 They're also really easy to dry!  All you have to do is lay them out flat on a baking sheet, bake them at a low temperature (like 150) for about 10 min until they're crispy.  They won't feel very hot, just dry.  Then you can take them and put them in a ziploc bag and crunch them up, and store them in a spice container (I use tiny little ball jars)

The flowers are just as good when dried!  They have a semi bitter taste to them but they are equally amazing used with potatoes!
 

Green Gardening: Starting your seeds with What?? Egg Cartons

As you may have figured from my thematic posts regarding green gardening, I've been a little nutso about cheap and green methods.  This one was suggested to me by a friend, and since I had a bunch of egg cartons hanging around for another project, I figured I could use one or two for this experiment as well. 


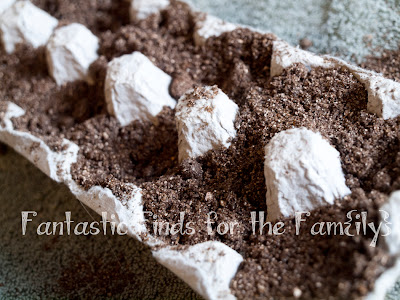
It's pretty straight forward, just put dirt in the egg carton and you're good to go!  I'd recommend only using the cardboard type, as this will allow for proper drainage for your soil.  Another thing I would recommend, because these dry out so easily, is to put them in a tupperware or other plastic receptacle and pour the water in it, and let it soak up through the bottom of the egg carton.  Seeds seem to like indirect moisture better than having it dumped straight onto the soil, and this seems to work better with this method.


We didn't start many plants in these this year, as I've been pretty obsessed with my Newspaper Seed Starters, but the ones we did are looking ok.  I'm going to have to either transplant them or get them in the ground soon, though, in order to keep them alive.


Have you done any green seed starting this year?  If so, let me know!  I would love to hear about all your trials, even if they're failures! :)

Tomatoes: Seed Starting and General Information

Tomatoes:

Tomatoes are fun to grow.  The only problem is that they take up plenty of room, you need to make sure that you account for this along the way.

I started my seedlings in my toilet paper roll starters to begin.   I prefer to start seeds out in a small setting and then move from there.  There are many different varieties, and it is always important to pay attention to the packaging and the specific directions for your varieties.  This year, I am growing Roma, Tiny Tim, Best Boy, Mana Lucie and Black Krim tomatoes.  Each of these came with slightly different directions to start.  I'm going to talk here in generic terms, and occasionally talk about more specific varieties.

Tomatoes need about 60 degree temperature to germinate and can take anywhere from 3-8 weeks to germinate depending on the variety.  Start these seedlings about 6-8 weeks before the last frost to ensure that they will have enough time to grow and be healthy before they have to go outside.  When they have two to three leaves, you'll want to transplant them into larger pots, and for these, I used my newspaper seed pods.  You'll need them in about a 3" pot at this point.  As with all indoor starting seeds, you will want to harden them off before they go outside, as they will not be used to the wind and varying degrees of temperature that await them in the garden.


When you go to place them in your garden, you'll want to plant them deeply, with the first true leaves from the plant just above the soil level.  This will stimulate root growth on the base of the stem and make the plant much more sturdy as it grows.  Another thing that you can do to make sure that your plant is stable is to trellis it, or to put it in a cage.


Remember they like warm, sunny, sheltered places and do not like to be overheated.  Depending upon the variety, you can expect to see fruit in about 70-130 days after you plant the tomatoes. 

If you have any helpful hints on growing tomatoes, please let us know!  I will share with you how our tomatoes do :)

Green Gardening: Starting Seedlings with What?? (Toilet paper tubes)

So as I've mentioned before, this year I'm trying to be "green" with my gardening.  I've already told you how eggshells can be used to start your seedlings, now here's another tip for you!!!

All you'll need for this is to save some toilet paper tubes and keep around a small container that you don't care about.  In this case, I used an old Glad Ovenware that I had bought and lost or destroyed the lid to.

First, you'll cut your toilet paper tubes in half, like this:


Then you'll set them in the container like this:


Then, go ahead and fill them with your seed starting mix!  After this is done, I add water, but not directly to the dirt, but to the outside of the container surrounding the little tubes.  The water will soak up through the toilet paper tubes and into the dirt. 


After everything looks like it's moist, go ahead and plant your seeds!  When you're ready to plant, you can either choose to leave the toilet paper tube in place or just rip it and it will come right off.  I'm going to take mine out only because I don't know how fast they'll decompose.  Perhaps I'll leave one or two as an experiment. :)

Are you a "green gardener"?  If so, share your tips!  We would love to experiment with more green gardening!

Celery: Seed Starting and General Information


This is our first year growing celery.  I'm growing just a couple of plants as an experiment, so this is all new to me as well.  This is all information that I have gathered from other resources, and I hope it helps both me and you, my reader.

I started my seedlings in eggshells, on 3/4/12 in a regular seed starting mix.  According to my package, these should sprout in 10-25 days.  I just scattered these on the top of the soil, as they need light to germinate.  One of my gardening books indicates that it can take a long time to germinate and to stay patient.  When two true leaves appear, transfer them into 3" pots and let them establish.  Then you'll harden them off and replant them when they have 5-7 true leaves.   According to one book, temperatures on these seedlings should never fall below 50 degrees for longer than 12 hours or they will bolt later in life.  If the weather isn't good enough for transplanting, trim them back with sharp scissors, keeping them at about 3" until outdoor temperatures are higher.

If your space is limited, container growing is good, when grown in deep containers.  When they reach 12" in height, begin blanching (or tightening) the plant by binding loosly with a collar by placing a 9-10" piece of thick paper around the stems of the plant.  Add more paper as the plant grows and develops.  These plants do not like to be dry.  Keep them very watered, especially when it is warm.

You'll be able to harvest this difficult plant somewhere between 100-120 days after you've planted it.  Harvest it gently by pulling the roots out from the ground with a garden fork.

If you have any helpful hints on growing celery please leave a comment!  Check back to see how our celery does!

Emerald Bell Peppers: Seed Starting and General Information


In our family, we almost always keep a bell pepper in the refrigerator.  There are more than enough meals that can utilize a pepper, and there are some times where I'm scrounging for dinner and a pepper sets off my imagination.

We've had good crops of bell peppers in the past and it's a great plant to have around if you're like me.  This year, we're growing Emerald Bell Peppers and I started the seedlings in eggshells, at a depth of 1/4" and they will take anywhere from 10-21 days to sprout.  You'll want to try to transplant these when they have three true leaves, placing them in 4-5" pots and moving them into their final position when they're about 4" high.  Make sure to harden these off and plant them after there is no danger of frost.

You want to make sure they're getting enough water when it's really warm, but to not waterlog them.  This is especially important when you're growing them in containers.  Harvest them with scissors or pruning shears when they're green to encourage more growth, or leave them on to have them change color.  Waiting to harvest them will make your yield less, however, so I recommend picking them when they're green.  They will store for about two weeks once harvested.  At the end of the season, you can uproot the plants and hang them by their roots and the fruit will continue to ripen.

Kohlrabi: Seed Starting and General Information


This is by far one of my favorite summertime vegetables.  I have a lot of memories of sitting around with my dad eating it raw, sliced with salt on it.  (Just the thought of it is making me drool right now)

The year before last, they did really well and I had much snacking.  Last year, I tried to do them in pots, however, and they really didn't like it.  I think it once again has to do with the two weeks where it was ridiculously hot and I couldn't keep anything watered properly.

This year, I'm again growing Kohlrabi, and am planning on doing some in pots and some in the garden, with the hope that I'll get at least something from my garden to eat this year.   This is a type of plant that you will want to grow in succession, so that you keep having harvests throughout the year.  planting one mound every 2-3 weeks is ideal if you have the space.

I started these in eggshells on 3/4/12, and will start another set on 3/25/12, and then another sometime in April.  After this time, I'll start the seeds in the ground directly as the weather should be consistently warm enough.  Start them at a depth of 1/2" in a regular seed starting mix.  They typically take between 10-14 days to sprout, but these little guys sprouted in less than a week! 

They really need to have their own space, otherwise they will check they're own growth.  If you plant these in containers, fertalize them moderately every 2-3 weeks and maintain a regular supply of water.

You'll harvest these in about 55 days, and try to pick them when they are between golf ball and tennis ball size, because when they get large, they tend to become woody.  They can be stored for a little while, but tend to lose flavor the longer they are stored.


This year, I'm really hoping to get a good crop, as I found this recipe that looks like it would be great to try!  I've never actually tried cooked kohlrabi, so I'm hoping this year's crop is a success.

Kohlrabi Sauteed in Butter

Peel any tough skin off kohlrabi, trim and scrub.  Boil whole for 20-30 minutes, then drain, cut and saute in a pan for a couple of minutes with melted butter.

The leaves are also said to be good boiled.

Five Ways to Get your Kids Excited about Gardening!

Antonio M. Rosario


Gardening is a great learning exercise for children of all ages; it teaches them how things grow, where the food we eat comes from and can help get picky eaters to try new foods.  Besides teaching valuable lessons about food, it can also teach a variety of useful life skills, such as; how to be patient(it takes time for plants to grow), dependability (plants need you to be there and care for them every day), responsibility (to take the initiative), and also places respect for environment in your child's hands.  Whether you are able to grow 1 plant or 100, it's a worthwhile summer activity that is bound to teach your children many valuable life skills.


If you don't have much space, or live in an apartment building where you cant plant in the ground, find a plant or two that you can grow in a pot!  There are also many "co-op" gardens, where you can rent a space in a shared garden or pay to receive a portion of their crops.  Many of these ask or require participants to help tend the plants and/or maintain the garden.  For those with less time, this may be the best option.


Tips for "growing" a successful gardener in your child:


1.  Start small. If this is your (or your child's) first time gardening, don't overdo it.  Many people make the mistake of trying to work with too many plants at once or learning too much at once.  With new gardeners, especially children, it is important to not let anyone get overwhelmed.  Chances are, if you let that happen, a lot of your plants will suffer due to your frustration.

2.  Don't pressure.  Encourage your children, but don't push them to enjoy it.  Last year, it took three different times before our seeds were actually in their pods.  The first time, she got distracted, so I put it all away, the second time, she got more interested in making signs for the plants, so I embraced it as an craft opportunity, and the third time, she sat with me for over an hour and planted every little seed herself.  By letting it be her decision, she came to be interested in the plants by herself, and then devoted all of her attention to it.  

3.  Set a Routine.  Plants need attention.  Some days they need more than others, but you should never go a day without checking on your plants.  Since children and plants both thrive on attention and routine, the two will go together easily.  I always like checking on the plants right after breakfast, and then again shortly before dinner.  If I make this a habit, that every day at these times we go check on the plants, it fosters a sense of responsibility and normalcy to what we are doing. 


4.  Let them explore.  There's many ways that you could do this, for one example, you could let your child have one plant that is all their own.  You let the child do all of the work nurturing it and helping it grow.  (You can of course provide suggestions, ie. Your plant is looking a little sad today... do you think it needs something?) This develops a sense of pride when their plant does well, as well as the consequences if it doesn't.  (of course, if you aren't the type to let a plant die, like myself, there's nothing saying you can't water it on the side....)  For a second example, you can let your child take the lead in your garden exploration.  Let them go ahead and look for new fruits and vegetables, find worms, bugs, weeds, etc.  You could take it a step further and make a chart before you go out with things to count, like Flowers on the Rose Bush, or Weeds we pulled, etc and let your child mark when they find this item!


5.  Show and Tell.  Let your child be proud of the things that they have grown.  Encourage them to help prepare it in the family meal, draw/take pictures of the garden, and talk about it.  Also encourage your child to take part in the gardening process from start to finish.  Let them help pick out seeds and pots and dirt and keep it up all through the summer!


I bet if you follow these simple tips that you will soon have a master gardener helping you and excited about all the new, fresh things they've discovered!