Showing posts with label holiday crafting. Show all posts

Salt Dough Ornaments {Craft Tutorial}

No comments:
Salt Dough Ornaments/ Gift Tags

Hey everyone!  I know it's early, but this is about the time of year in which I kick into full on holiday crafting mode.  Today I'd like to share with you the salt dough ornaments that I made last year for everyone in my family.  Not only did they serve as ornaments, but I also used them to label everyone's gift, so they also served as gift tags!  These little guys are so easy to make and very versatile so they can fit any theme that you would like.  

Materials needed:

For the dough:

1 cup salt 

2 cups all purpose flour 

1 cup luke-warm water 


For decorations:

A leaf from a tree or shrub of your desire, the more textured the better
Paint in any color you desire
Sealant of some sort (either a clear spray, mod podge, anything you like)
any other embellishments that you might like
string for hanging

Instructions:
Mix flour and salt in a bowl.  Gradually add water while stirring with your hand.  Knead the dough until it reaches a nice soft consistency.

Roll the dough out (I recommend that you keep it thin- less than a half an inch and much closer to a quarter inch- to help maintain the integrity of any design, as it can bubble during baking if it gets too thick) and use cookie cutters to cut into shapes, or create the shapes yourself!  For mine, I used a small glass to create the circles, and a star cookie cutter to create the stars.


When you have all your dough cut, take a skewer (toothpick, or other small pointy object) and poke a hole through for your string to create a hanger later.  For my circular ornaments, I took a leaf and pressed into each circle to create a leafy texture.

When you're done shaping and designing your dough, place on a cookie sheet in a 200 degree oven and bake for anywhere from 30-60 minutes.  You'll know they are done when they are firm and might even be starting to brown.  

Let your creations cool and then let the decorating begin.  For my stars, I first painted them white with a basic acrylic paint and let that dry.  I then painted metallic blue acrylic paint on one side of the star, and wrote the recipients name on the other side.


For the circles, I painted them red and green, and let that dry.  Then I came back and lightly sponged on white to give them a textured look and to add definition to the leafy prints.  Then I wrote the recipients name on the back side.  


Tie a piece of string through the hole you made and you've made yourself a pretty ornament/gift tag!


7 Months to Christmas! Goals for June!

No comments:
May was a busy month for me- a lot of progress was made, but not a lot of finishing was done.  I'm hoping this month will be good for some finishing!!!  I've been updating my lists as I go along, and you can see that I have one person completely done and almost one thing done for every person who is getting multiple items.  Some items changed- based on other things that I tried or worked out.

Check out my updated list:


Must Craft For:
Queen Bee  -   pillow/snowflake  (pillow needs back, stuffing and seaming)
Striker – single serving treats/pies in jars/something food/hotpads/snowflake {blanket 2013}
Lily – a bed sized blanket/snowflake 
Lucy –  bed sized blanket/snowflake
MIL - snowflake/hotpads/hat/scarf{blanket 2012}
SIL - cowl/snowflake {blanket 2013}
Linney – dw mittens/snowflake/ dw crochet hook
Hubs -  Extra big & long blanket/sampler style?  (12 squares of 24-30 done, depending on how big 24 comes out)

Would like to craft for:
Aud - snowflake/hotpads/crochet hook 
Kynz - fingerless mitts
Efan -  Creeper hat
Humph - mittens/cardi?
Shep - hat? (aquabats)
V -  snowflake/horse something?  computer sleeve?
FIL –club covers?
STLM - club covers? {blanket 2013}  (1 done, 2 to go)
GGJ- Snowflake/hotpads
Soo- Snowflake/hotpads
Al- hp crochet hook

In Progress:
club covers
cowl for SIL
Testing for blanket designs for the girls
Extra big and Long Blanket- Sampler
Pillow- need back and seaming

Designs to do:

Completed:
All snowflakes for misc people
dw crochet hook
hp crochet hook
crochet hook with grip
Creeper hat
12/24 or 30 squares for Big and Long Blanket
1/10 Hotpads
Pillow Front

As you can see, I've completed a few things that make me happy- particularly the squares for the big and long blanket.  They're working up really nicely and I'm working out many kinks as I go.  In fact, I'll probably host a Mystery CAL after the holidays with this as the pattern!  I've got 10 different squares I've designed, and am using 10 different colors throughout (kind of an experiment in using up some leftover yarn in semi coordinating patterns)

I've pretty much set everything that everyone is getting, and am now focusing on making big progress on wiping out some of the easier projects this month so I can cross some more people off my lists!  I will be doing a lot of traveling this month and was thinking that hotpads would make great car projects!!  Plus, cotton is easy to fit into bags and they're light and small for the summer heat.  

This month, make sure your list is finalized, and try and finish a person or two to make the rest of your year easier!    Let me know how you're doing in the comments below!

8 Months to Christmas! Kick into Gear!

No comments:
With the start of the summer, comes outdoor activities, less crafting time and more heat!  Smaller projects are a virtue during the summer, so that you don't overheat.  This is the time of the year to make hats, mittens, socks, and all those other small projects!  That isn't saying that you shouldn't work on blankets, especially if you live somewhere that you have cool nights!  I myself have switched to working motifs for blankets since it's getting warmer!
Well, without further ado, welcome to May!  May should be a big time for finalizing portions of your list and knocking out a couple of projects!  Trust me, you'll feel better if you do!  Time to review our lists!

Here's how mine looks after April's work:

Must Craft For:
Queen Bee  -   Shawl like black and white one/snowflake  
Striker – single serving treats/pies in jars/something food/hotpads/snowflake {blanket 2013}
Lily – tiny animals, totoro set, a bed sized blanket/snowflake
Lucy – animals, aquabats anything, TMBG dolls, bed sized blanket/snowflake
MIL - snowflake/hotpads/socks{blanket 2012}
SIL - cowl/snowflake {blanket 2013}
Linney – socks/mittens/snowflake(something knit)
Hubs -  Extra big & long blanket/sampler style?

Would like to craft for:
Aud - snowflake/hotpads (something knit)
Kynz - fingerless mitts
Efan -  Creeper hat
Humph - mittens/cardi?
Shep - hat?
V -  snowflake/horse something?
FIL – Green Bay Packers Blanket/club covers?
STLM - club covers? {blanket 2013}
GGJ- Snowflake/hotpads
Soo- Snowflake/hotpads

In Progress:
club covers
sock testing
cowl for SIL
Testing for socks and mittens
Testing for blanket designs for the girls

Designs to do:

Completed:
All snowflakes for misc people

All of the items that are stricken out are finished, the blue highlighted items are in progress, the green highlighted items are ones that I have something in mind and the yellow highlighted items are in the planning phase.  As you can see, I've finished some of the bulk work that I wanted to do and have made some headway on both testing and work on projects for people.  I've also worked on refining my list to pinpoint people that I have figured out or ones that I need to work on ideas for them.  This month, my goal is to finish off the two projects that I currently have in progress and work towards the designs for several others.  

Goals for May: 

Pin down the final designs for all remaining people that you haven't started projects for.
Finish at least one small project and work on a larger project.
Be able to cross at least one person off your list!


As a bonus, here are some quick and easy projects that you can try to cross some people off your crafting list!

Lace Scallop Hat (Knit)

Unforgettable Hat (Crochet)

Sifu Soap Sachet and Scrubbie


Soft and Sweet Heart Sachet
Bulky Stacked Shell Cowl
Luxe Cowl

There's some quick and easy projects to get you started.  Here is hoping you can finish a project or two this month!!!  

(Oh and hey, shouldn't I get props for being on time this month??  *bows*)


9 Months to Christmas- Craft your way to a Happy Holiday! April's goals!

No comments:
April's Goals are the most simple of them all.  Hopefully you've started on your big item (or at least one of the items on your list), and maybe you've even finished something!  I am halfway done with one present and have been testing things for another.  You'll want to come back to your list again and look and see if any of your ideas have changed.  Here is my list (with updates and more comments!)

Must Craft For:
Queen Bee  -   Shawl like black and white one/ oval doily/ bath stuff/snowflake {blanket 2012}
Striker – single serving treats/pies in jars/something food/hotpads? {blanket 2013}
Lily – tiny animals, totoro set, a bed sized blanket
Lucy – animals, aquabats anything, TMBG dolls, bed sized blanket
MIL - snowflake/hotpads/socks{blanket 2012}
SIL - cowl/snowflake/hotpads/socks {blanket 2013}
Linney – socks/mittens?(something knit)
Hubs -  Extra big & long blanket/sampler style?

Would like to craft for:
Aud - snowflake/hotpads/socks (something knit)
Kynz - fingerless mitts
Efan -  Creeper hat
Humph - socks/mittens/cardi?
Shep - hat?
V -  horse something?
FIL – Green Bay Packers Blanket?
STLM - club covers? {blanket 2013}
GGJ- Snowflake/hotpads
Soo- Snowflake/hotpads


As you can see, I've added more "bulk creation" items (where i can make similar "copies" of an item for ease of gifting).  

I have a collection of snowflakes that I had been working on in my spare time, so this seems like a good year to give them out- so they've been added to my list, and hotpads are super easy- I love this vintage thick and easy potholder and all of my giftees love them too!

While I can't totally cross anyone off of my list yet, I've got a good start and lots of testing going.  I'm hoping this month to finish at least one project, sort through my snowflakes, and complete some testing/begin crafting on tested works.

Your goals for April are:

1) continue working on projects that you started in March.
2) test what you need to to prepare for work
3) work even more on finalizing your list
4) Finish at least one project, no matter how small- Just so you can have the pleasure of marking one thing off your list!!


Halloween Look Book 2012

No comments:
It's September, and in my world, that means it's almost holiday season!  It's time to start planning what crafts we'll be doing, when we'll fit them into our busy schedules and for me to judge how much energy I have for making Halloween costumes and Christmas gifts.  Last year, for Halloween, we made Shrunken Apple Heads and Decoupage Jar Candles.  For Christmas, we went all out and made a ton of "Food in a Jar", along with a Naughty and Nice themed Christmas that featured said food in a jar, a homemade washcloth or potholder (crochet) and some had some nice bath items, like Sugar Scrubs.

This year, I've already got a strong start on Christmas presents, with a list of 13 "Must Craft For" people, 11 "potential simple project" people, and 8 "would like to craft for" children.  (I know I have a funny list, but when I'm thinking about crafting for this many people, I have to have some point where I can say, no, I'm too stressed out and this part I can drop and just pick them up something they'll enjoy equally)

I already have three projects for the "Must Craft For" people started, and ideas for another 7 of those, and just three people who I don't know what I'm making for yet.  I'm sure it will come to me during my planning.

As for crafts, I've been pinning like mad, finding great treats and ideas to implement when the time comes.  Here's a few of my favorites that I've found (not that I'm doing all or any of these, but a girl can look, can't she?):

For Halloween:

While this first one isn't something that I would actually wear, I do find it incredibly witty.  First, it's crocheted.  Second, you're a burger! It's now got me thinking... what else could I crochet to be a wonderful halloween costume, something that would make everyone say "Wow!  You made that?"
More to come on this thought later, I'm sure.

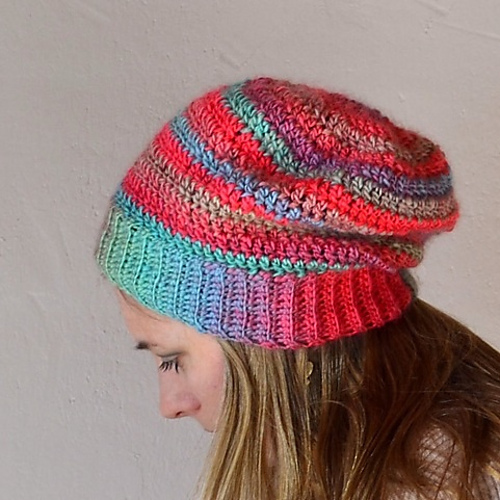
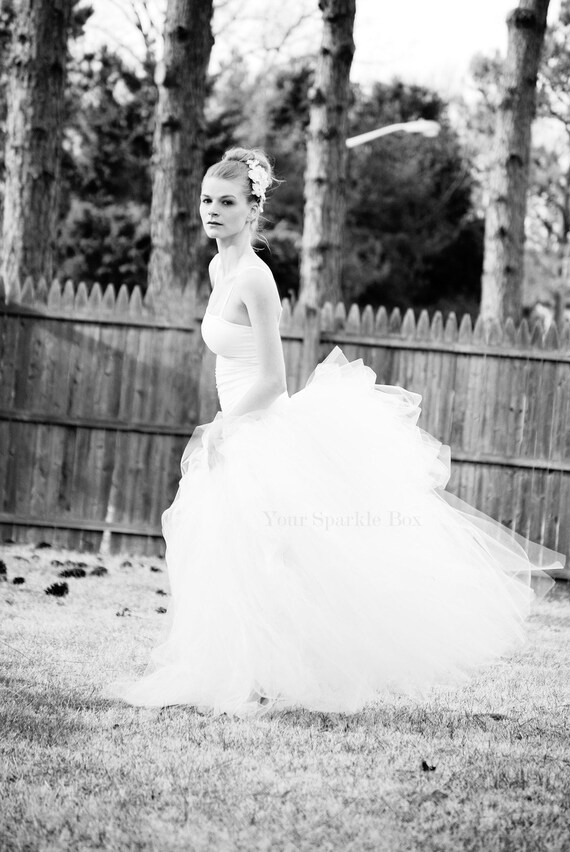
For the girls, I am LOVING the look of these long tulle dresses.  They're adorable!


And why couldn't mom have a big fancy skirt too?  I could play the evil queen or something :)


 I love crafting for these holidays.  I always try to involve my children so that the crafts have more meaning, and I add something new and homemade and fun to our collection every year.  These are just a few of the things that I've been dreaming of for Halloween decor. :)


 For treats, I found some spookilicious ones!


For the kids, Brain Cakes in a jar, or apples, peanut butter and marshmallows as a snack.


Who says mommy can't have something fun too?  Vampire Blood Cocktail :)

Oh and love love love this window display.


I think that's all for now.  What sort of things are you dreaming of for the upcoming holidays?  I'd love to hear about things you've done or dream about!


Link up your projects, past or future for all to enjoy!


Very special gloves for a very special lady

No comments:
 

If you can't tell, I'm all about gifts of the homemade variety.  I always try to make something special or unique that you wouldn't be able to get anywhere else and usually make it something that is unique to my gift receiver.  This year, I knit my very first pair of gloves.  I made them for my grandmother in-law who is one of the most wonderful women that I have ever had the pleasure of meeting, let alone being able to call family.  Many years ago, she worked for a factory.  One day, she had the misfortune of the machine clamping down on her hand and cutting off the fingers of her right hand.  They went straight to the hospital, with her fingers, but were unable to reattach them.  Ever since, she has lived, and done quite well with just one good hand.  (She cross-stitches, and she's amazing at it- a true inspiration)  
On one of my visits to my husbands' hometown, I was testing out a knitting pattern, trying to see if I could get the hang of it.  I finished off one fingerless mitt (wasn't really happy with it, and to this day, this particular mitt is still sitting in the bottom of my "to-finish" stack).  Well she tried it on, and made an offhand comment that she hadn't ever had a properly made pair of gloves.  She couldn't wear gloves because they didn't fit her bad hand, and fingerless mitts left her cold.  
I took it upon myself to try and find a pretty pattern, and to work making a pair of gloves that would serve her needs.  I made the left hand just as the pattern described, which was hard enough itself, as this was the first time that I had ever made fingers.  It took weeks of putting it down, picking it up, getting frustrated, getting over it and putting it back down again before I was finally done.  
Then, I left it alone for about week, wondering if I would ever be finished with them.  Then in a sudden burst of inspiration, I started and finished the second glove, which turned out to be much easier because instead of fingers, all I had to do was keep knitting and then close off as if for a mitten.  It worked great. 
Overall, not my finest work, the fingers were a wee bit funky, and the cuffs did this weird thing, probably because I didn't do a garter stitch for long enough, but the reaction was all worth it.  She laughed and hugged me and tried them on many times for everyone to see.  It is this sort of gifting that makes all of my crazy labor over the year worth while.

Why don't you try finding one truly unique thing you can make for someone this year?  You might be surprised at how it makes you feel!

Holiday crafting, Loofah {Crochet Pattern}

No comments:
I made a couple of these Loofah's for inclusion in my holiday crafting this year.  They're so easy to make and are such a great gift!

Copyright 2010-2012 LiLu Studios: This Crafting Life, by Lori Steffens. {http://www.thiscraftinglife.com/} Make it, Wear it, Love it, but above all, Share it, don't Sell it!
Materials:
Size H, I or J Hook
A cotton/acrylic blend of yarn.  (You can also just use cotton, I do not recommend using straight acrylic yarn however)  

Instructions:

ch 4, form a ring by joining with a sl st in first st 
ch 40 
sl st into center of ring (this forms the loop for hanging the loofah)

R1: ch2, dc 40 into center of ring, join with sl st
R2: ch2, dc 3 in each st around, join with sl st
R3: ch2, dc 3 in each st around, join with sl st
R4: ch2, dc 3 in each st around, join with sl st

Bind off. Weave in ends.

You can play around with the thickness of the loofah here too, by in the last row, working 2dc, then 3dc around instead.  It will give it a more ruffly texture and be a little looser.

Holiday Crafting, Tutorial, Sugar Scrub

No comments:
 

Sugar scrubs are so easy to make that it is ridiculous.  I have to say that after making them for everyone, I will never buy another one for myself.  The ones that I made came out wonderfully and I was so pleased to give them as gifts for everyone!

Begin my mixing 2 1/2 Cups of Sugar with 1 Cup of Extra Virgin Olive Oil. 
Add in 4 Tablespoons of Lemon Juice {or scented essential oils to your liking- I made three varieties, Lemon, Peppermint and Jasmine}. This mixture will make enough to fill a 12oz. Mason Jar.

You can add color to the mix or any vitamin oils for the extra benefit to your skin, such as Vitamin E or B (or really any that you desire).  

The sugar and the oil will separate, so instruct your gift receivers to stir the mix thoroughly before using!

Holiday Crafting, Tutorial, Reindeer Poop Cookies (Toffee Blondies) in a Jar

No comments:


I thought these cookies just sounded amazing, so I converted them into jar cookies!  These are Toffee Blondies, and they're incredibly easy to put together and just look amazing in the jar.  I thought they deserved a naughty name and thus they were called...

"Reindeer Poop Cookies"
 
Ingredients for the jar: 

1 cup brown sugar
1/2 cup mini chocolate chips
1 cup flour
1 teaspoon baking powder
1/4 teaspoon salt
3/4 cup chopped pecans or walnuts
1/2 cup Heath Chips
1 quart size mason jar
To make the Toffee Blondies:
the contents of the jar
1/4 cup melted butter
2 lightly beaten eggs
1 teaspoon vanilla

How to construct the Jar:
 
Layer the brown sugar, chocolate chips, flour, baking powder, salt, Heath chips, and pecans.

Preparation Instructions:

To make the Toffee Blondies, melt some butter in a bowl.  Whisk in the eggs and vanilla.Pour in the contents of the jar.  Even that looks pretty doesn’t it? Pour the batter in an 8x8x2 pan coated with cooking spray.  Bake in a preheated 350 degree oven for 25 to 30 minutes or until the blondies are set and start to pull away from the sides of the pan.  Cool in the pan and cut into 16 bars.


Holiday Crafting, Tutorial, Jingle Your Bells Coffee (Snickerdoodle Coffee)

No comments:
 

I created this recipe to be reminiscent of Snickerdoodle cookies, using many of the same things that you use to make the cookies themselves, and I think it's downright delicious!
"Jingle Your Bells Coffee"

Ingredients for the Jar:

1 cup sugar
1 cup nonfat dry milk powder
1/2 cup powdered non-dairy creamer
1/2 cup cocoa powder
3 tablespoons powdered instant coffee
1/2 teaspoon ground allspice
1/4 teaspoon cinnamon


Construction Instructions:

Mix all of the ingredients together well and put into jars.  Decorate the Jar with cloth, ribbons, or labels and make sure to attach the preparation instructions!

Preparation Instructions:

For single serving place 3 tablespoons mix in mug and add 3/4 cup boiling water.

Holiday Crafting, Tutorial, Stocking Stuffer Stomach Pumper Coffee (Toffee Coffee)

No comments:
 
Once again, another great name thought up by my husband, and another great recipe that I've put together!  This one is for an instant drink mix that is Toffee Flavored Coffee!  I hope you enjoy!

"Stocking Stuffer Stomach Pumper Coffee" (or Toffee Coffee)

Ingredients for the Jar:

2/3 cup instant coffee
1 cup non-dairy creamer
1 cup brown sugar


Assembly Instructions:

Mix all ingredients together and place in a jar.  Decorate the jar with ribbons, stickers or cloth and make sure to attach a tag with preparation instructions!

Preparation instructions:

To serve, place 2 to 3 teaspoons of mix in a mug and add boiling water.

Holiday Crafting, Tutorial, Joy to the Cookie (Cranberry Nut Cookies) in a Jar

No comments:
 
I really wish I had taken a picture of just the jar here, because this mix, when layered, looks gorgeous.  The cookies themselves are lovely!  

Joy To the Cookie

Ingredients for the Jar:
  • 5/8 cup all-purpose flour
  • 1/2 cup rolled oats
  • 1/2 cup all-purpose flour
  • 1/2 teaspoon baking soda
  • 1/2 teaspoon salt
  • 1/3 cup packed brown sugar
  • 1/3 cup white sugar
  • 1/2 cup dried cranberries
  • 1/2 cup white chocolate chips
  • 1/2 cup chopped pecans

Assembly Instructions: 

Using a canning funnel, layer the ingredients in a 1 quart canning jar in the order listed.  Decorate the jar with cloth, stickers, ribbon or other accessories.  Make sure to include the cooking instructions!


Cooking Instructions:
 

Ingredients not Included:
1/2c. softened butter
1 Egg
1 tsp. vanilla

Preheat oven to 350 degrees F.  Grease a cookie sheet.
In medium bowl beat together the ingredients that were not included with the jar until fluffy.  Add the contents of the jar and mix together until blended.
Drop by heaping spoonfuls onto baking sheets, bake for 8-10 minutes.
Cool.

Holiday Crafting, Tutorial, Christmas Tree House Fire Coffee (Bavarian Coffee)

No comments:
 

This coffee was designed with the crafting of my "naughty" gifts.  My husband named it, I thought it was hilarious and had to use it.  It is actually a bavarian coffee, which is often used with mint of some sort. Making the coffee was very easy. 

 Christmas Tree House Fire Coffee (Bavarian Coffee)

Ingredients for the Jar:
In a bowl, mix the following ingredients:

1/4 cup instant nonfat powdered dry milk
1/3 cup granulated sugar
1/4 cup instant coffee
2 tablespoons unsweetened cocoa powder


Assembly Instructions:

Then, using a canning funnel, pour the mix into a canning jar, tapping the jar on the table to settle it a bit.  Then, decorate the jar however you like, with a square of fabric, a piece of ribbon, sticker, tag, whatever that you like.  Make sure you include the directions on how to serve a cup!

Cooking Instructions:

To serve combine 3 tablespoons of mix with 1 cup boiling water; stir to blend.

Holiday crafting, Tutorial, Cream of Elf (er... Mushroom) Soup

No comments:

This is yet another soup that was made for my "Naughty and Nice" gifts.  This soup is just amazing, and the kudos for the awesome name goes to my husband, who giggled for a long time before he was even able to share it with me.  It's easy to put together, and it looks incredible in the jar.


Cream of Elf (er.... Mushroom and Wild Rice) Soup

Ingredients for the Jar:

  • 1 package Country Gravy Mix (2.75 ounces)
  • 1 tablespoon chicken bouillon granules
  • 2 teaspoons dried minced onion
  • 1 teaspoon dried parsley flakes
  • 1/4 cup uncooked wild rice
  • 1 cup uncooked white rice
  • 2 tablespoons coarsely chopped dried mushrooms (I used Oyster and Porcini)
Assembly Instructions: 

Pour Pioneer Country Gravy Mix into wide-mouth pint jar. In small bowl, stir together bouillon granules, onion, celery and parsley. Pour into jar to make second layer. Add layers of wild rice, white rice and mushrooms. Seal with lid.

Decorate the jar with cloth, stickers or ribbon and don't forget to include a tag with the cooking instructions!

Cooking Instructions: 

Empty contents of jar into a large saucepan. Add 7 cups water; heat to boiling. Reduce heat; cover and simmer for 25 to 30 minutes or until rice is tender, stirring occasionally. Garnish with chopped fresh parsley. Makes 6 servings.

      Holiday Crafting, Tutorial, Oh Soup Divine - Soup in a Jar

      No comments:
      This again is a mix of a few different recipes that I had looked at for my "Naughty and Nice" project, and after a little fine tuning, I must say that it is a delightful mix!  Without further adieu, here is my "Oh Soup Divine" mix in a Jar!


      "Oh Soup Divine"
      Ingredients for the Jar
      • 1/3 cup beef bouillon granules
      • 1/4 cup dried minced onion
      • 1/2 cup dried split peas
      • 1/2 cup uncooked small shaped pasta
      • 1/4 cup barley
      • 1/2 cup dry lentils
      • 1/3 cup long-grain white rice
      • 1 cup uncooked tri-color spiral pasta
        Assembly Instructions:

        Use a canning funnel to fill your jar with ingredients.  Using a wide mouth 1 quart canning jar is easiest.  Layer the ingredients in the order provided, tapping the jar on the table occasionally to help items settle.

        Decorate the jar with fabric, stickers or ribbon and make sure to attach the cooking instructions.

        Cooking Instructions:

        In large kettle, brown 1 pound ground beef or stew beef cut into bite-size pieces in a little olive oil. Remove tricolor pasta from top of jar and reserve. Add the rest of the jar contents to the kettle with 12 cups water. Let come to a boil and simmer 45 minutes. Add tricolor pasta and simmer 15 minutes more. Serve with your favorite bread or rolls and a tossed salad.