Crafting from the Kitchen: Relaxing Bath Soak {DIY Salt Bath Soak Craft Tutorial}


I wish that I had gotten pictures of the process of making these beauties, but they're so simple, they really don't need a whole lot of tutorial to go along with them! They're wonderful to smell and soak in and I guarantee that anyone that you gift these to will become a lover of bath time!!  


First, gather your ingredients.  I've included an easy to obtain list of ingredients here:
Scented Oils: My personal favorites are Vanilla, Peppermint, Lavender, and Orange
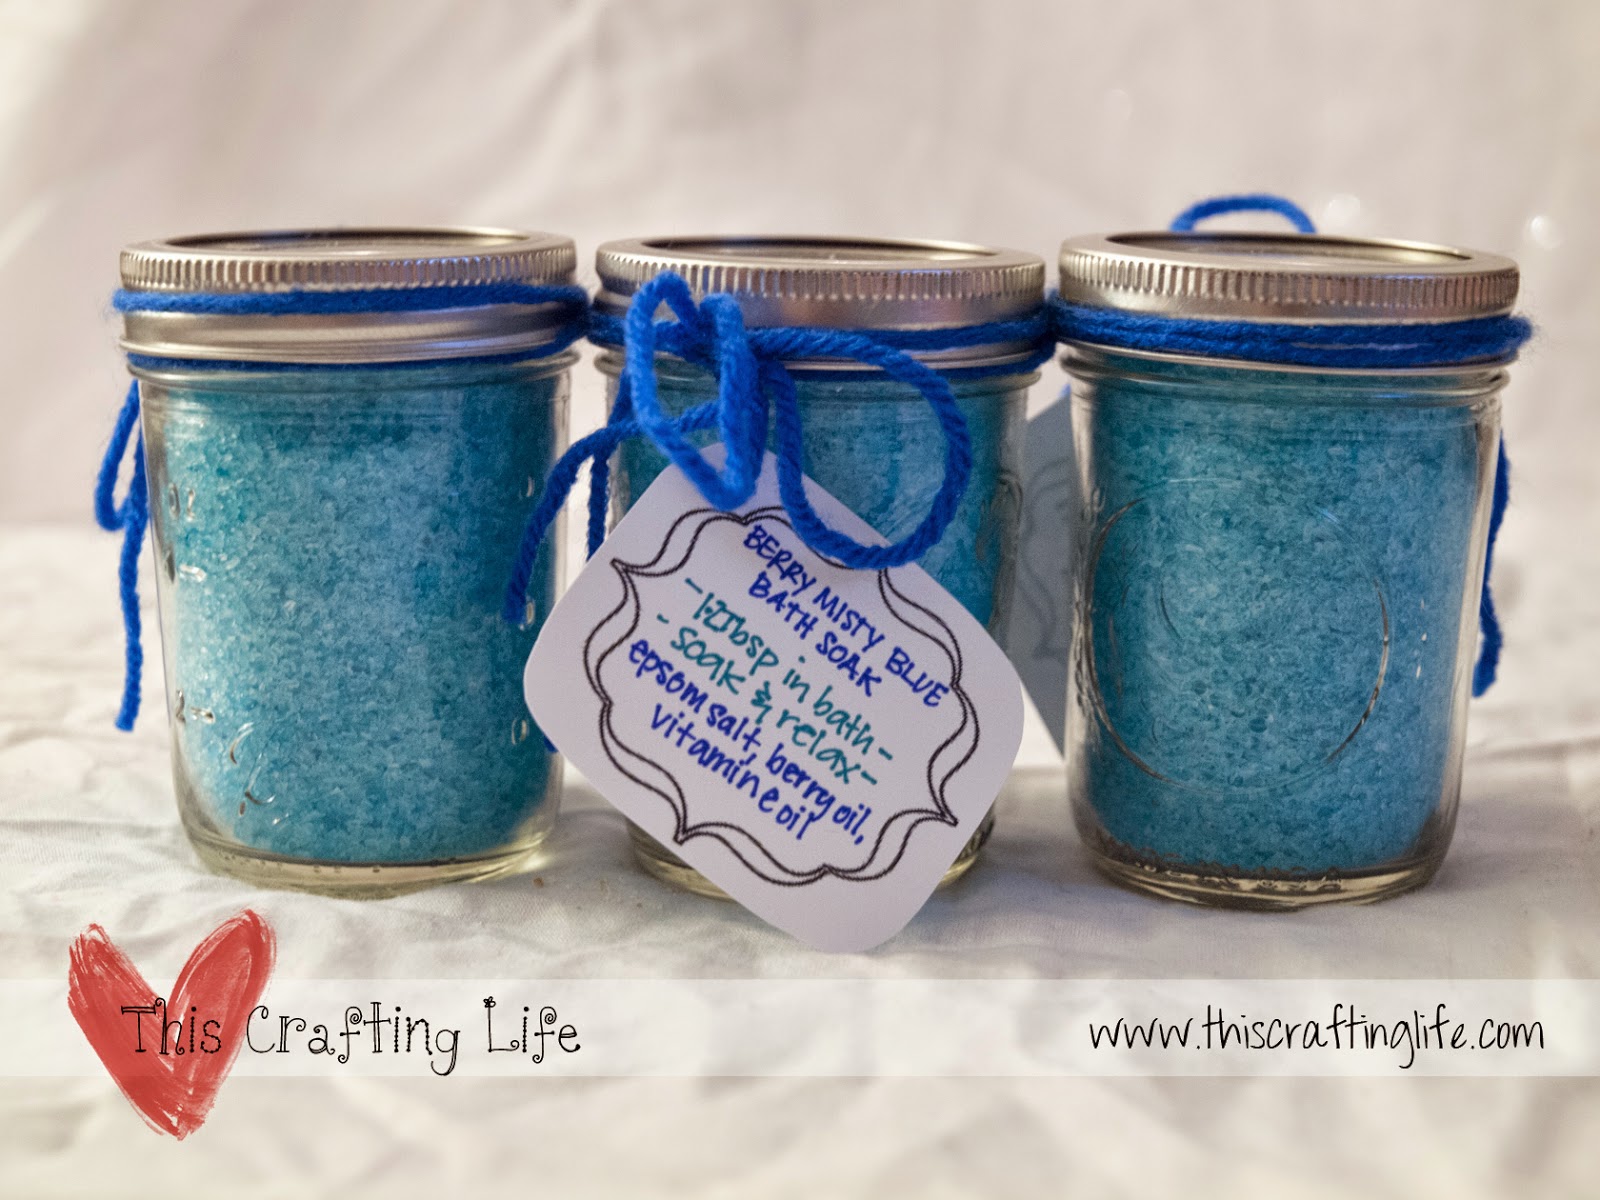
Gift tags to label your jars
Mixing bowls


First, using your jar as a measuring device, scoop out the appropriate amount of salt.  (I made three jars at a time, so I would add three jarfuls of salt.  For the peppermint swirl, I put one and a half jars in each bowl and then only colored one bowl)
Second, sprinkle a few drops of oil and coloring over the top of the oils.  Adding less is better at this stage as you can always add scent but can't take it away.  Stir your mixture well to incorporate the color and scent.  If you feel like you need more color or smell, repeat this step as many times as necessary.
Third, sprinkle about a tablespoon of vitamin e oil over the mixture and then stir again to get it coated throughout.  
Lastly, scoop the salt mixture into your jars and seal.  Add a label or some ribbon or yarn for decoration.  


I hope you love these Bath soaks as much as I do!  Not only do they smell great, but they look pretty too!  Feel free to leave a comment below!

Wee Crown Photography Prop {Crochet Pattern}

You know how sometimes life gets away from you?  Well, I have a photography business that I run, as well as all of the crafts, websites and raising children, so I can get quite busy and sometimes leave something behind a little bit.  Usually in my life, the two things that suffer are my websites and my crafting.  Well, thus is not the case with the crafting this time - I've been working on lots of great projects, but I haven't posted about any of them!

Today, I'll share with you one of the simple things that I made while I've been absent!

I knew a friend was giving birth to a girl, so I worked out this adorable little crown for her to wear during our shoot:


It was super easy and took maybe 15 minutes.  Here is the pattern!

Wee Crown Photography Prop {Crochet Pattern}

Special Stitches:  V-stitch: (dc, ch 2, dc) all in same st.

Materials needed:
Small amount of worsted weight yarn (you can also go dk or sport, but adjust your hook size accordingly and expect it to be smaller)
Size H crochet hook

Pattern:

Ch 30, join to make ring.
R1: ch 3, dc in each st around, join to top of ch 3 with sl st (30 dc)
R2: ch 4 (counts as dc and ch 1), dc in same space, skip two dc, *V- stitch, sk two dc* around, joining with sl st to 3rd ch of ch 4 from beginning of round.
R3: sl into ch 1 sp,( ch 2, 2 hdc, 2 dc, 3 hdc) all in ch 1 sp, sl st in next ch 1 sp, *(3 hdc, 2 dc, 3 hdc) in ch 1 sp, sl st in next ch 1 sp* around, join with sl st to top of ch 2 from beginning of round.

Hope you all like it!  Feel free to leave a comment below!!!

Pardon me, while I break my blog....

So some of you may know I have been having a terrible time with my blog lately....  There's lots of reasons that I don't have a lot of time right now to get into, so I will save that for another post.  Anywhooo, While it's already broken, I'm going to do some more breaking, and tweaking and putting it back together while I work on deeper internal issues.  If you can't find something that you are looking for, please feel free to shoot me an email at contact.lilu.studios@gmail.com and I'll get back to you as soon as I can!!!

~Lori

It Is What It Is Pillow {Knit/Crochet Chart}


This is really such a fun piece.  I actually worked it up on my knitting machine, and then filled it with a prestuffed pillow.  (I didn't want to mess with stuffing it myself)

Use the chart below to work up your piece.  If you are knitting, you'll knit one stitch for every grid on the graph.  If you're crocheting, it gets a little weird.  I find that 1:1 works well enough for single crochet (sc) but that you can also use double crochet with 2 stitches for each square.

You can work the same on the front and back or you can work up a solid piece for the back (which is what I did).  If you're going to do a solid back, just work the same amount of stitches and rows from the graph and it will work up to be the same size.  You could also sew on a piece of fabric if you don't want to work a piece for the back.

You can find the chart for the pattern here, and it comes with an additional 9 quirky sayings graphs for you to use!:  It is what it is Pillow Pattern

If you like this one, I have a whole new line that I'm going to be putting up in my shop very soon!!!

Feel free to ask any questions you have in the comments section below!

My Pattern Experience: Racing Arrows Hat [crochet pattern review}


For Christmas this past year, I decided to make a set of 6 hats that would all go together yet each one be unique and different. It was because of this that I found this Racing Arrows Hat on Ravelry. This was the perfect hat to tie in to the set and I loved working the pattern up.  It was fairly easy to do if you are familiar with working the front post dc (fpdc), and the color patterning is very visually striking so people are always wondering "how long did it take you to make that!?!"  I have plans to make many more of these hats!
Overall, an easy to work fun hat with great detail!

The LAST! in a long long list of WIP's!

I never thought I'd reach the end, but we finally have!!!  Here's the last of the WIP's that I've been working on.  I'm working through the box and hope to have either frogged, completed or repurposed everything in this box!  Some things have already been frogged or finished and I'm glad that I'm making some progress through it finally!!!  Hopefully a lot of it will make great gifts!

WIP #45

The weather scarf.  I think it was Caron who put on this crochet along.  You were supposed to assign colors to different tempurature ranges and then crochet a couple of rows everyday.  Sounds easy, but I just couldn't keep up.  It didn't help that I decided that I wanted to also designate different stitches to different weather conditions, ie cloudy, rainy, snowy, etc.  I ended up giving up on it after probably 15-20 days and stashed it away.  I have actually already frogged this piece as of writing this. :)


WIP #46

I have absolutely no idea.  Really, seriously, I have no idea what this little circle was supposed to go to, or why I held onto it.  It's in the frog pile.


WIP #47

This is an interesting little strip.  I think it was meant to be the start of a cardigan or something.  I'm not sure why I put it away, but now that I'm looking at it again, I'm thinking it might make a great cowl with a few adjustments.  We'll see.


WIP #48


This was the start of a vest that I was making for my sister in law.  I didn't end up liking how it was coming out with the yarn that I was using, so I pulled out the needle and left it laying around.  I'll frog this piece as well. 


WIP #49

I was trying to make an autumn themed shawl.  I started this and switched patterns.  Frog pile!


WIP #50

My first attempt ever at a sock.  The shape is perfect, but the size is too big.  I need to reduce the stitches, but that won't happen with this one.  It's in the frog pile.


WIP #51

This was a first prototype for a quilt like blanket that I wanted to make for my grandmother in law.  I got this far and realized it was starting to look like a swastika so I stopped.  Onward!


WIP #52

I was going to make a diaper bag.  This was to be it's pocket.  I was tired and pregnant and went out and bought a diaper bag instead.  This will be frogged.


Whew!  We made it through the ridiculous list of WIP's that I have in store for myself this year.  The next time that you hear me talk about them, there will be progress!!!

What are you working on right now?  Leave me a comment!

Sweater WIP's, New Year's Resolution Post... Again!

Today's WIP sharing session is brought to you by SWEATERS!  I have several in different stages that got stashed at weird points and I even forgot that I had a few of these!!


WIP #40

This sweater actually started its life meant to be the Uptempo Vest I found on Ravelry.  After I worked the two panels, however, I found the vest to be a little long for my liking and a little lacking in the flair department.  I pinned it up to my mannequin and went to work.  I added this small pineapple in the back:


As well as pineapple sleeves in gray and a nice gray trim.  Now I'm just waiting until my next trip to the craft store to find some buttons for the front, then all I have left is to join the arms to the piece and sew in all the ends.  It could probably use a good wash and block as well. :)


WIP #41

This is a simple sweater dress that I started based off of the Spiralis pattern on Ravelry.  I added a cable coming out of the pocket and am probably about 40% done with this one, but I can't find the notebook with my project details right now!  Not to mention that whatever yarn is attached to the piece is the last I have of that color until I can get to the craft store.  bummer!


WIP #42

This one is pretty much done, but needs to be cleaned up (the dryer was not nice to this one!) and the armpits need to be reseamed.  


WIP #43

Since this picture, this piece has undergone a lot of change!!  I'm working on a new pattern for a sweater dress for my youngest child.  She loves all things frilly so there's lots of ruffles involved but it's still not quite done.  When I took the picture, I just had these two front and back pieces for the top of the sweater. :)


WIP #44

This is my attempt at the Paris sweater.  I started it on knitting needles, but then got my knitting machine and went... wow.  I need to do this on the knitting machine instead!!  So I worked for a good 4 hours one night and cranked out this large piece, bound it off, and discovered that it needs more length.  I will have to reattach it to the knitting machine and add about 20 more rows before I can finish it off. 


The more I talk about these, the more I mentally note for myself in the future!  I've frogged a ton of projects and also finished a few now, and I'm so glad there's only going to be one more installment of WIP's before I can start sharing finished projects!!!

What are you working on?  Share below!!!

New Year's Resolution, WIP City!

In the interest of finishing my posts about the WIP's in my box and moving on to the finishing aspect, I'm bombarding you with these posts to finish them up.  The next set I have to share with you is all stuff that is really close to being finished.  Let's not delay and get on to...


WIP #35

I ran out of yarn.  I stashed it.  I'm pretty sure I have enough yarn to finish it in the right color and if I don't maybe I'll just add a contrasting color band at the bottom.  Who knows, right?


WIP #36

Super simple boot cuffs, made from some of my favorite yarn.  Just need the ends woven in!!


WIP #37

A pattern of my own design, this filet panel is meant to be in my bedroom, hopefully soon serving as a curtain panel!!


WIP #38

This hat was coming out too large for my head, so I left it.  I want to turn it into a slouchy hat and sell it on my website.


WIP #39

After I made this hat, I realized I don't like single crochet hats.  I think I'm going to turn it into a bear and sell it soon.


So there you have it, even more WIP's to add to my list.  These at least will be very easy to finish up!
Do you have any WIP's you're working on?  Leave me a comment below!

New Year's Resolution, Finishing those WIP's

Here we meet again, over another round of unfinished projects in my stash.  It just keeps climbing, and I hope to be able to say at the end of the year that I've gotten most of them done.  I sure hope I can!  I've already started working, and have finished a couple of projects and also frogged a bunch, but it's progress nonetheless!  Without further adieu, lets move along to...


WIP #30

My kids love everything Hayao Miyazaki.  One of their favorites is My Neighbor Totoro, and I promised that I would make them a catbus.  Well, I started, but haven't finished and it's been sitting in a box for quite some time.  I'm hoping to finish it this year and get it in their room and out of my box!!!


WIP #31

This is the start of my attempt at a barbie sized crochet doll.  I love how her head looks, but gave up after an arm, for some unknown reason.  Hopefully I can remember what I did with that arm to replicate it on the other side!!!


WIP #32 and #33

I'm not entirely sure what I plan on doing with these once they're done.  The bags are done, the fruit pictured is done, they just need ends woven in.  I wanted to add some vegetables and then I will either gift these or sell them on my shop.


WIP #34

My girls door was broken, so I was making them a beaded curtain.  My basement flooded and all the beads that I had were lost.  I stashed it and now their door is fixed.  I plan on finishing it eventually, but I'm not sure when or what I'll do with it once it's done.


There's my shares for today, do you have any projects in process you would like to share??  Leave a comment below!!

Valentine's Day Scouting Sunday


This week, since it is finally February, I'm looking toward valentines day!!  Here are a bunch of awesome DIY ideas from across the internet to brighten your house for valentine's!!!


Have you made any of these?  Leave me a comment below!!!